
Welcome to Studio Saturday! Each week one of our contributors gives you a sneak peek into their studio, creative process or inspirations. We ask a related question of our readers and hope you'll leave comments! As an incentive we offer a free prize each week to bribe you to use that keyboard. The following week we choose a random winner.
This weeks winner is Shaiha, Congratulations! You have won a digital copy of Erin's Bohemian Knotted Earrings TUTORIAL. The PDF file will be sent to the winner via email once I receive the winner's email address.
This week we visit the studio of Tari Sasser at
Creative Impressions In Clay.

I didn't have time to participate in the ornament blog hop.
So, I thought I would make one for Studio Saturday.
 Lets start with cutting the top and bottom off of 2 Sprite cans.
Cut the can in half lengthwise. Cut those two in half, you should have 4 strips. Cut the 4 strips in half.
8 strips total from one can, 16 from 2 cans.
 I drew out a shape on a piece of 1/4" luan plywood. My darling husband cut it out for me on the bandsaw. Put a wash of green on the tree and brown on the trunk.

You need a wicked sharp pair of scissors. Cut your strips of the aluminum can into scallops.

Start from the bottom and layer (like shingles on a roof) your scalloped strips using a glue gun or in my case, since I couldn't find the glue gun, double backed carpet tape. Bend over the edges to the backside. This may take a bit of coercing on the sides of the tree so the strips on the back are straight.
Keep layering and overlapping your strips till you reach the top.

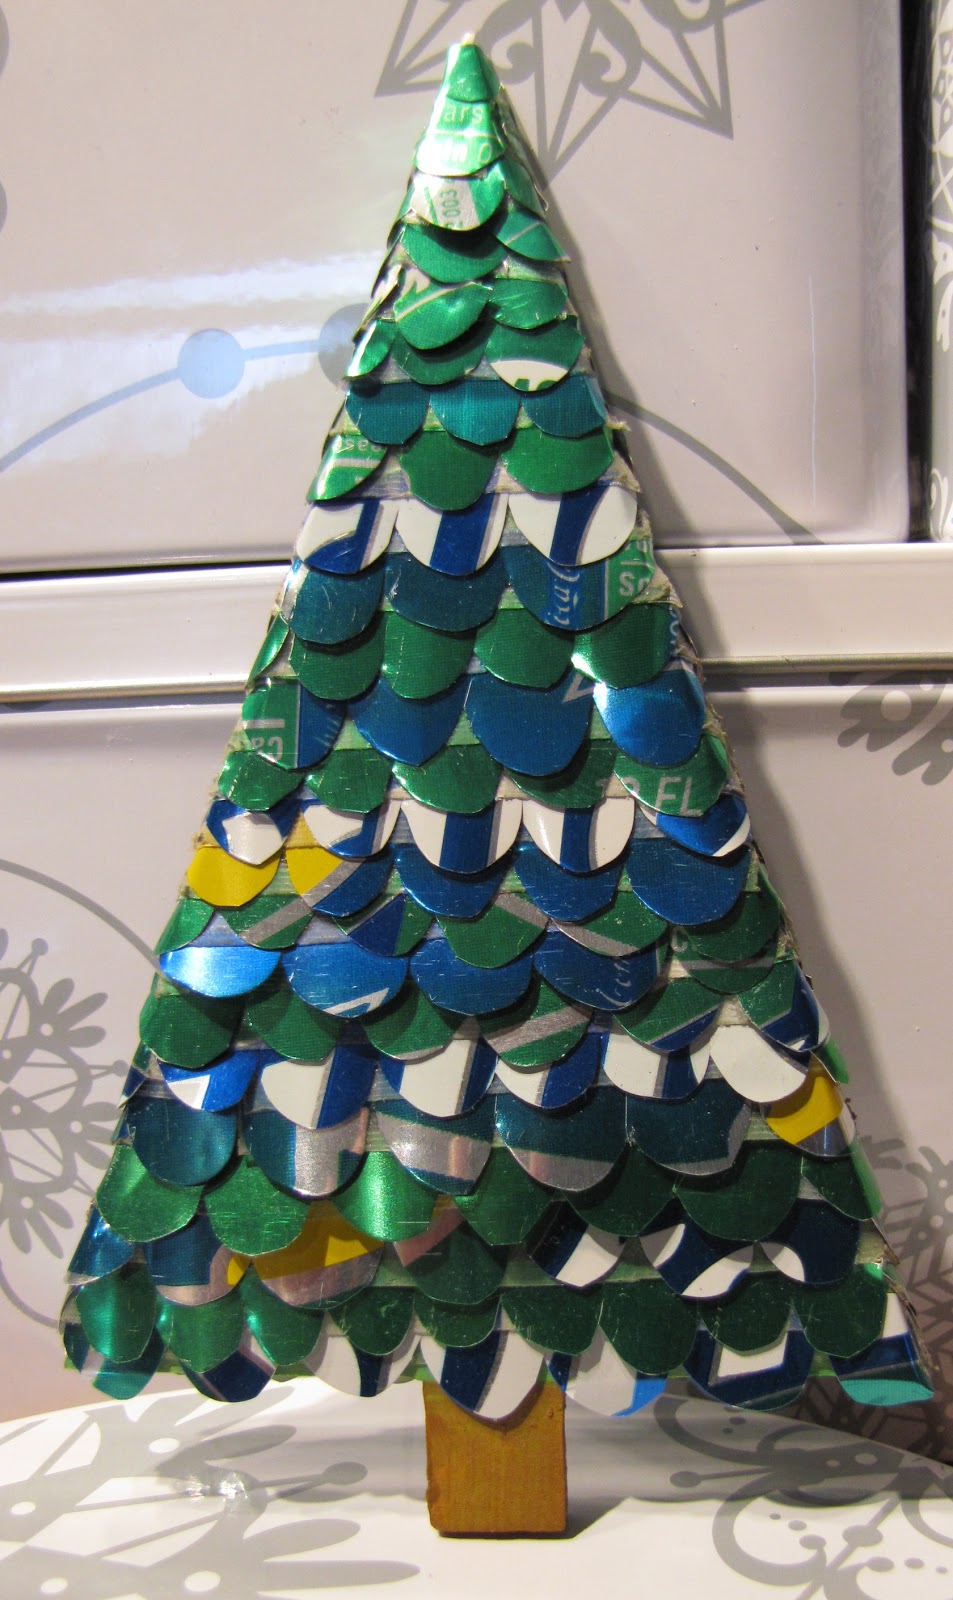
Fully layered tree. I then applied Modge Podge and sprinkled fine pearlescent glitter on the tree so it looks frosted. You may choose not to do this step.

I used Vintaj 25mm Altered Blanks, metal stamps and acrylic paint for the topper. A wooden dapping block was used to round the disk. The tree is decorated with my charms and felt balls from Ornamentea. I put a jump ring through the disk, added 10" of ribbon, a glass donut and a decorative copper ornament hook. Voila!


I didn't have time to participate in the ornament blog hop.
So, I thought I would make one for Studio Saturday.
Cut the can in half lengthwise. Cut those two in half, you should have 4 strips. Cut the 4 strips in half.
8 strips total from one can, 16 from 2 cans.


You need a wicked sharp pair of scissors. Cut your strips of the aluminum can into scallops.

Start from the bottom and layer (like shingles on a roof) your scalloped strips using a glue gun or in my case, since I couldn't find the glue gun, double backed carpet tape. Bend over the edges to the backside. This may take a bit of coercing on the sides of the tree so the strips on the back are straight.
Keep layering and overlapping your strips till you reach the top.
Fully layered tree. I then applied Modge Podge and sprinkled fine pearlescent glitter on the tree so it looks frosted. You may choose not to do this step.

I used Vintaj 25mm Altered Blanks, metal stamps and acrylic paint for the topper. A wooden dapping block was used to round the disk. The tree is decorated with my charms and felt balls from Ornamentea. I put a jump ring through the disk, added 10" of ribbon, a glass donut and a decorative copper ornament hook. Voila!
My question today is:
What Makes you happy?
What Makes you happy?
I love to create! It keeps me happy. I haven't had much time in my studio lately but take the time when you can. My job lets me create displays for art. Plus I get to be around art everyday. Happy, Happy!
Leave a comment on Art Bead Scene's Blog answering the question and you could win a snowflake button.

Feeling Sassy as usual!
Tari Sasser
Creative Impressions In Clay


